


In my years of working with home gardeners, I've watched kale transform from a trendy superfood into a backyard staple: and for good reason. This leafy powerhouse isn't just packed with vitamins and minerals; it's one of the most forgiving vegetables you can grow. Whether you're planting your first garden bed or you're a seasoned grower looking to add variety, kale deserves a spot in your rotation.
Let's dive into everything you need to know about growing this nutrient-dense green from seed to harvest.
Why Kale Belongs in Your Garden
Before we get our hands dirty, it's worth understanding what makes kale such a valuable addition to your growing space. This leafy green is loaded with vitamins A, C, and K, plus it's rich in antioxidants and fiber. But beyond its nutritional profile, kale offers something many vegetables can't: incredible resilience.
Kale thrives in cool weather, actually becoming sweeter after a light frost. It's not picky about growing conditions, tolerates partial shade better than most vegetables, and provides an extended harvest window. You can pick leaves for months rather than dealing with a single harvest day. That's the kind of garden efficiency I can get behind.
Starting Your Kale Journey: Seeds are Your Foundation
When it comes to kale, starting with quality heirloom seeds makes all the difference. Heirloom varieties offer superior flavor, genetic diversity, and the ability to save seeds for future seasons. At Farmer Flints, we're big believers in the power of open-pollinated, non-GMO seeds that connect you to gardening traditions spanning generations.
You have two paths for starting kale: indoors or direct sowing outdoors. Both work beautifully, and your choice depends on your climate and timeline.
Indoor Seed Starting
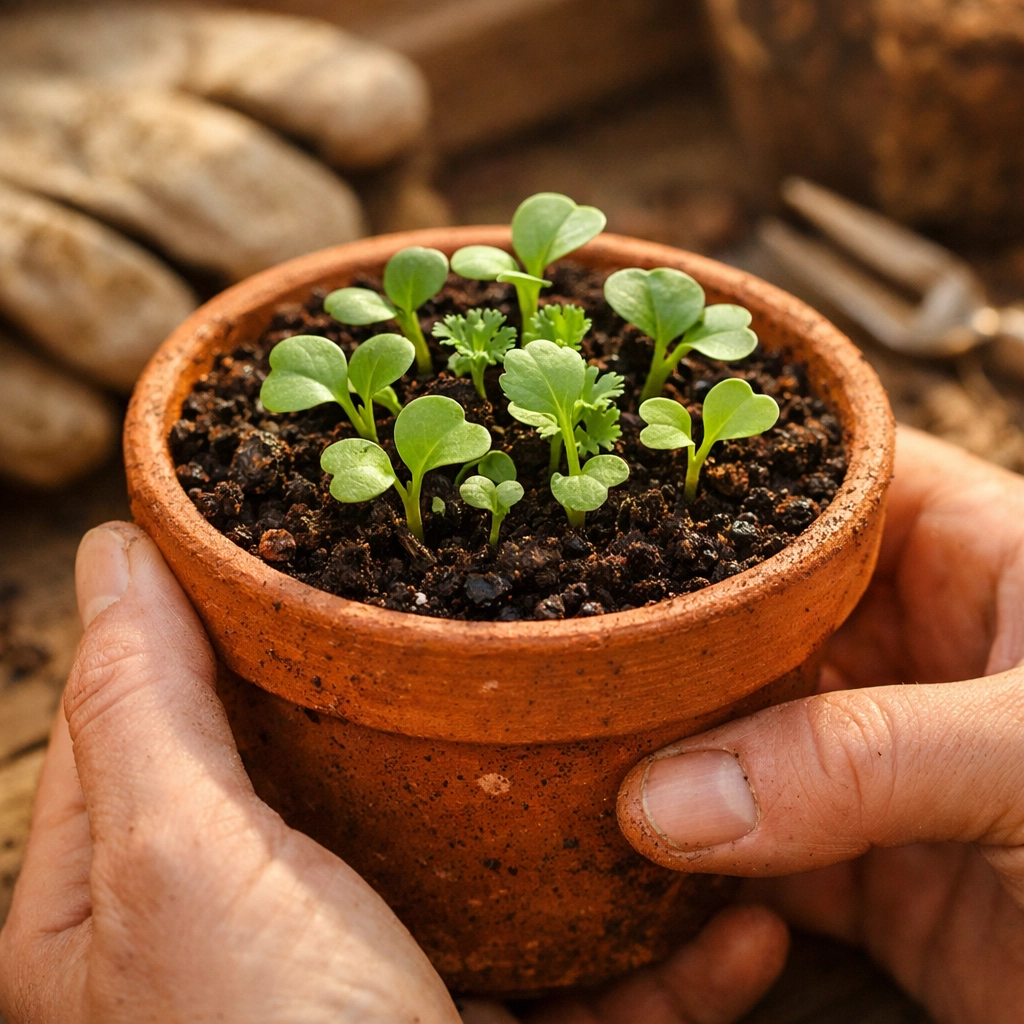
Starting kale indoors gives you a head start on the season and better control over germination conditions. Here's the approach I recommend:
Sow 2-4 seeds in 2-inch pots filled with quality seed starting mix. Keep soil temperatures between 50-60°F: kale doesn't need it warm to sprout. After germination, thin to the strongest seedling per pot. Provide 16 hours of light daily using grow lights positioned a few inches above the seedlings.
Your seedlings will be ready to transplant outdoors 4-6 weeks before your area's average last frost date. Remember, kale is a cool-season warrior that laughs in the face of light frosts once established.
Direct Sowing Outdoors
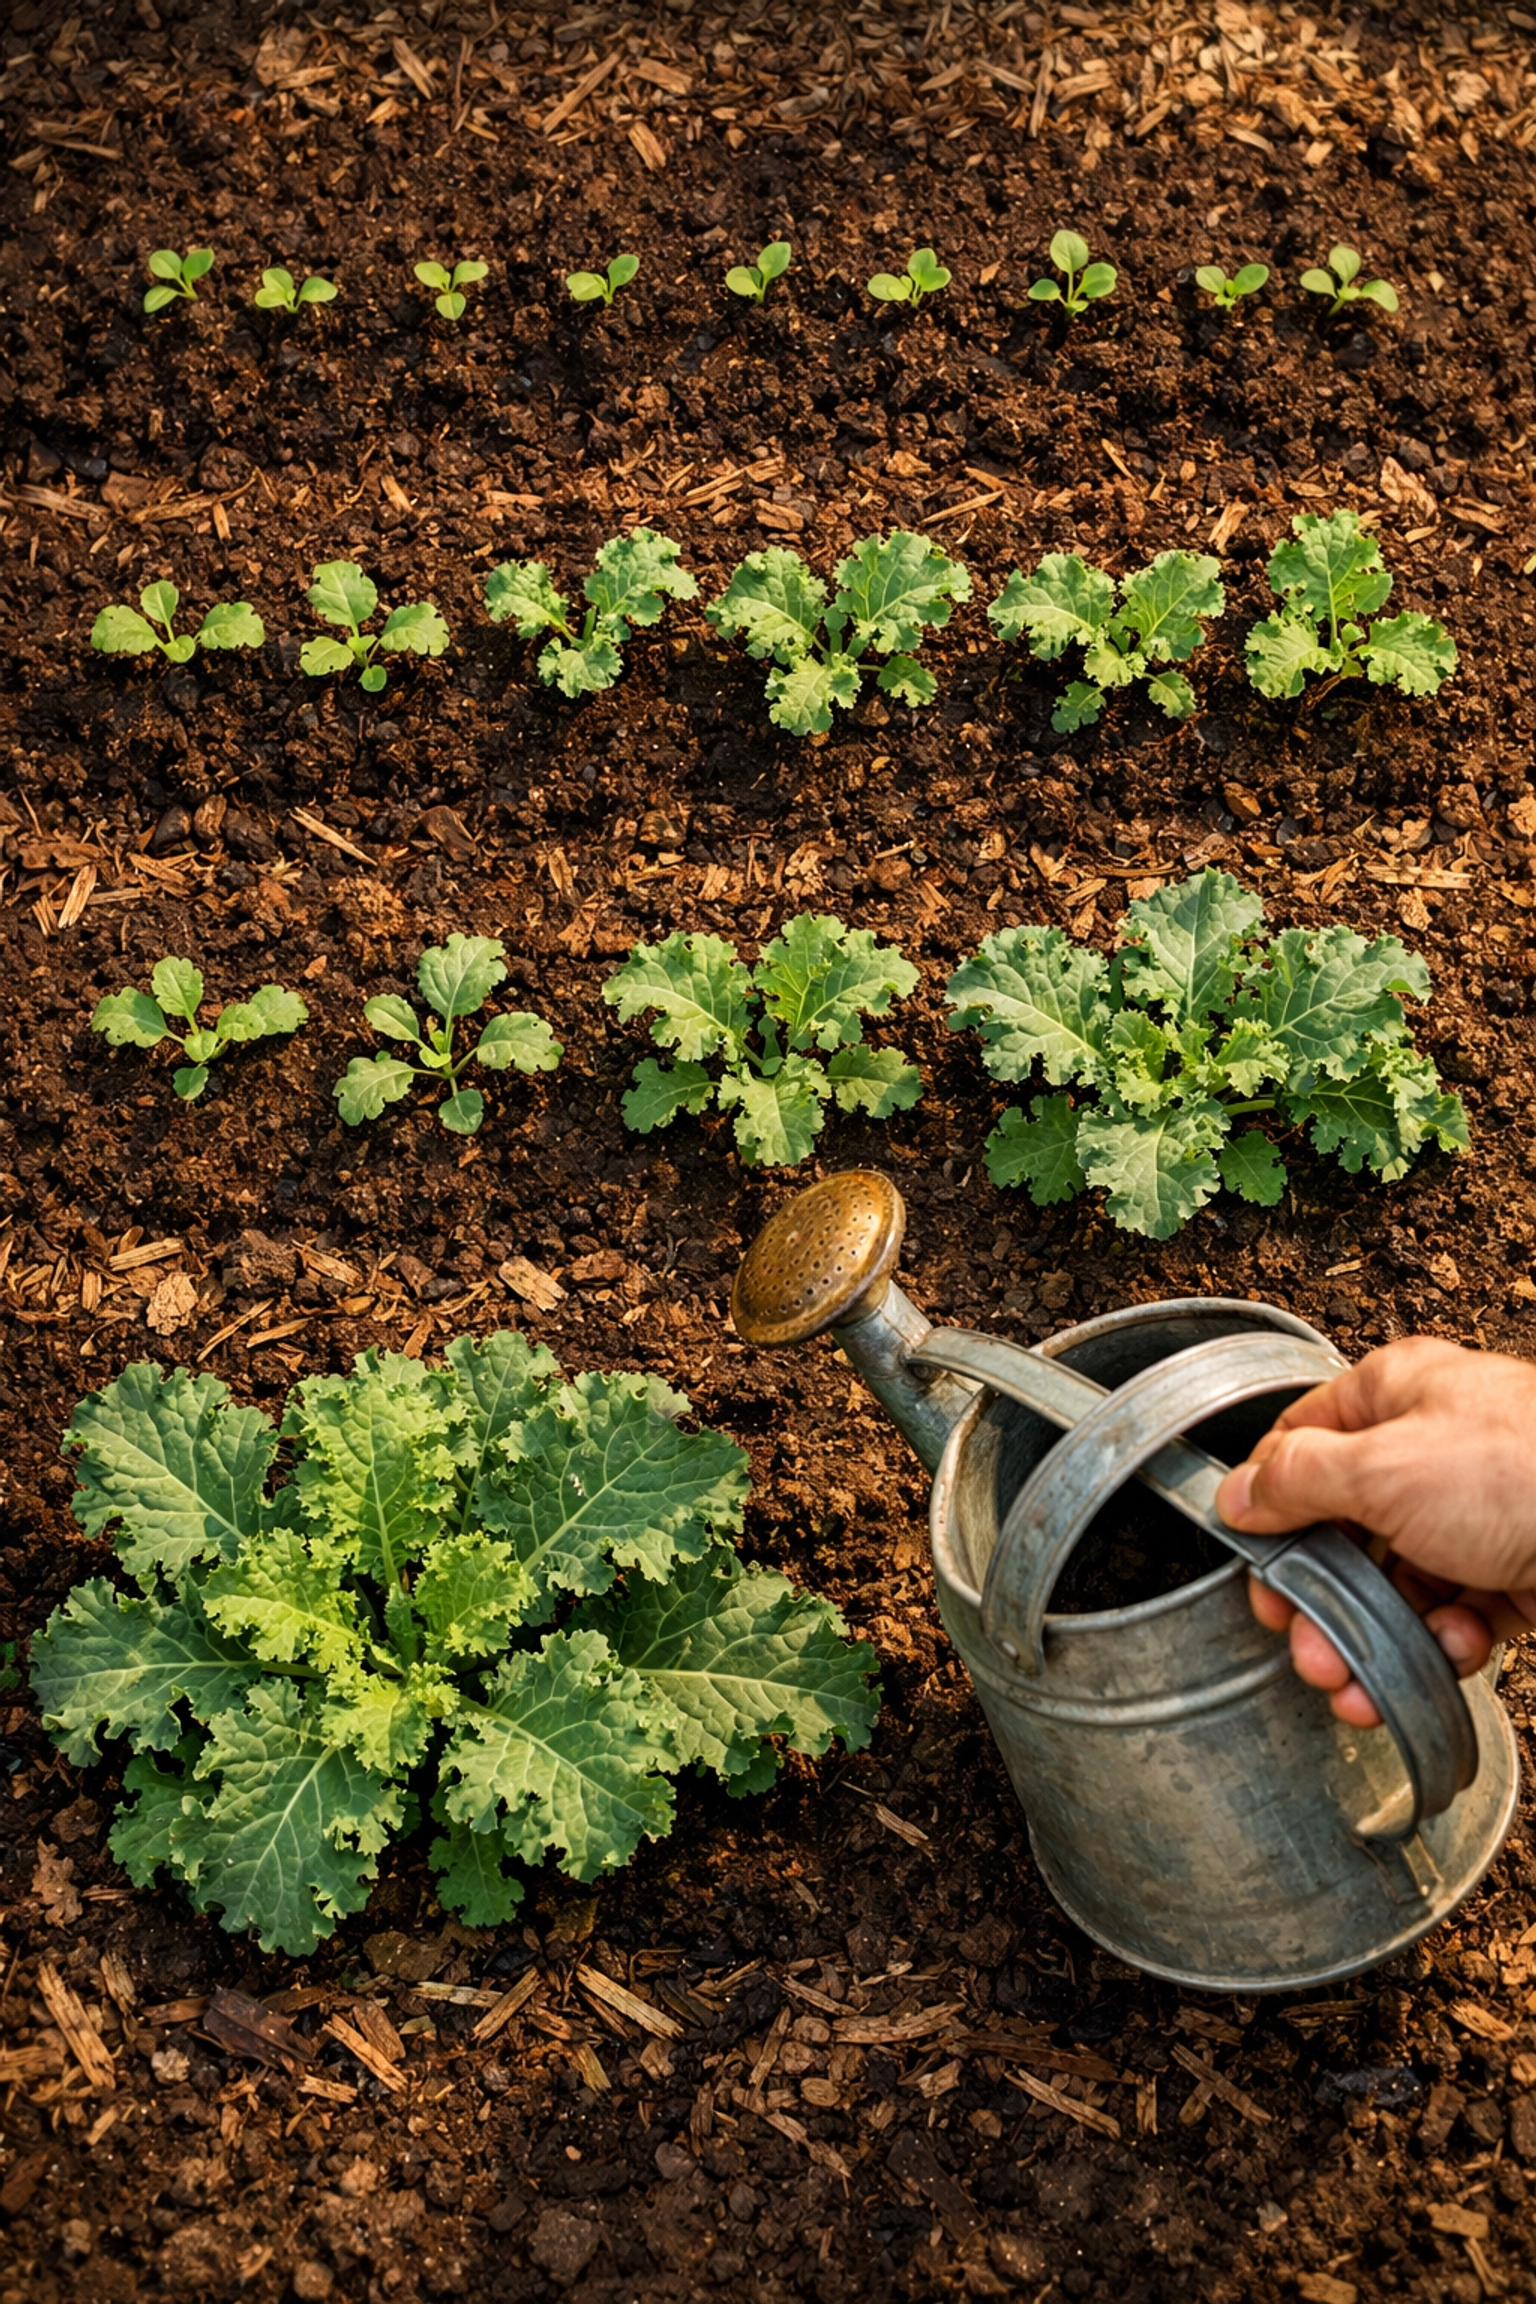
If you prefer the simplicity of direct sowing, kale accommodates that perfectly. Plant seeds about 1/4 inch deep in prepared soil, spacing them 3 inches apart initially. Keep the soil consistently moist: think damp sponge, not soggy mud: and you'll see sprouts popping up in 6-9 days.
As seedlings grow, thin them to 6-9 inches apart for baby leaf production or 18-24 inches apart if you want full-sized plants. Those thinnings aren't waste; toss them in a salad and enjoy your first kale harvest early.
Timing is Everything: When to Plant Kale
Kale's superpower is its cool-season nature. While other vegetables are withering in the heat, kale is just waiting for its moment to shine.
For spring planting, sow seeds or transplant seedlings as soon as your soil is workable: typically 4-6 weeks before your last expected frost. The plants will establish during cool spring weather and provide harvests before summer heat arrives.
But here's where kale really proves its worth: fall and winter growing. Plant seeds or transplants in late summer, roughly three months before your expected first fall frost. The plants will mature as temperatures cool, and many varieties will continue producing through winter in milder climates. That frost I mentioned earlier? It actually improves kale's flavor by converting starches to sugars. Nature's own sweetening process.
If you're planning your growing calendar, checking out resources on understanding hardiness zones can help you nail these timing windows for your specific location.
Soil: Building the Foundation for Success
Kale isn't particularly demanding, but like any crop, it performs best when given proper growing conditions. The plant prefers fertile, well-drained soil with a pH between 6.0-7.5. Think of soil preparation as setting the table for a feast: you want everything in place before your guests arrive.
Before planting, work several inches of quality compost into your garden bed. This adds organic matter, improves drainage, and provides slow-release nutrients. I also like to incorporate a balanced organic fertilizer at planting time to give plants a nutritional boost.
The beauty of kale is its adaptability. While it loves rich soil, it will grow in less-than-perfect conditions. It's more tolerant than many vegetables, making it ideal for newer gardeners still learning to read their soil.
Planting and Spacing: Giving Kale Room to Thrive
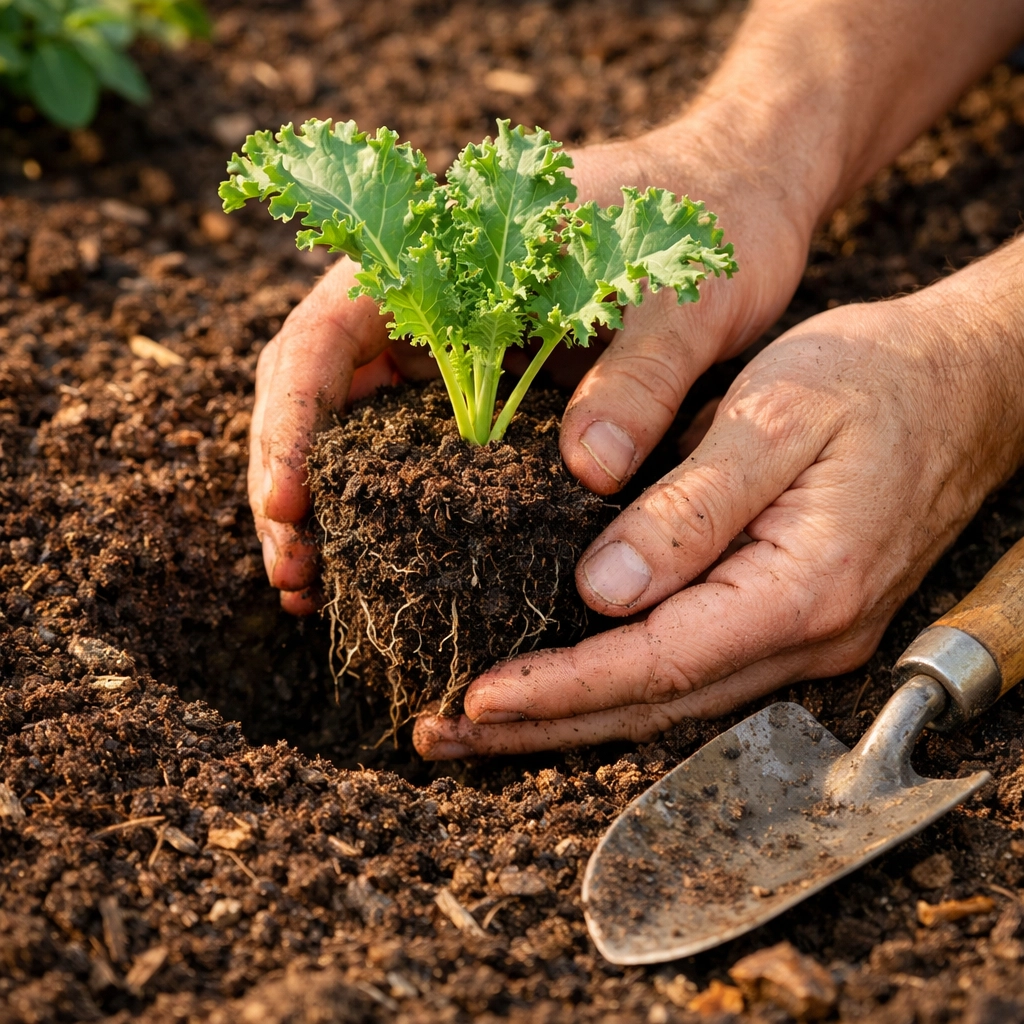
Proper spacing prevents overcrowding, improves air circulation, and reduces disease pressure. When transplanting seedlings, plant them right up to the root collar: that's where the stem meets the soil. Don't bury it deeper, but make sure it's secure.
For full-sized plants, space them 18-24 inches apart in all directions. If you're planting in rows, keep rows 18 inches apart. This might seem generous when you're planting tiny seedlings, but kale develops into substantial plants that need elbow room.
Container growing works beautifully for kale, especially if you're short on garden space. Use containers at least 12 inches deep and wide with good drainage holes. Just remember that containers dry out faster than in-ground beds, so you'll need to stay on top of watering.
Watering and Ongoing Care: Low-Maintenance Nutrition
One of kale's best qualities is that it's not a heavy feeder. You don't need to fuss over it constantly or follow complicated fertilization schedules.
During germination and the first 2-3 weeks after transplanting, keep soil consistently moist. This is critical for establishment. Once plants develop 10-15 leaves and roots dig deeper, you can reduce watering frequency to every other day or every third day, depending on your climate and rainfall.
A simple technique called "hilling": adding compost around the base of growing plants: provides a nitrogen boost that supports abundant leaf production. Do this once or twice during the growing season, and your kale will respond with lush, tender growth.
Mulching around plants helps retain moisture, suppress weeds, and moderate soil temperature. Organic mulches like straw or shredded leaves work wonderfully and break down over time to improve soil structure.
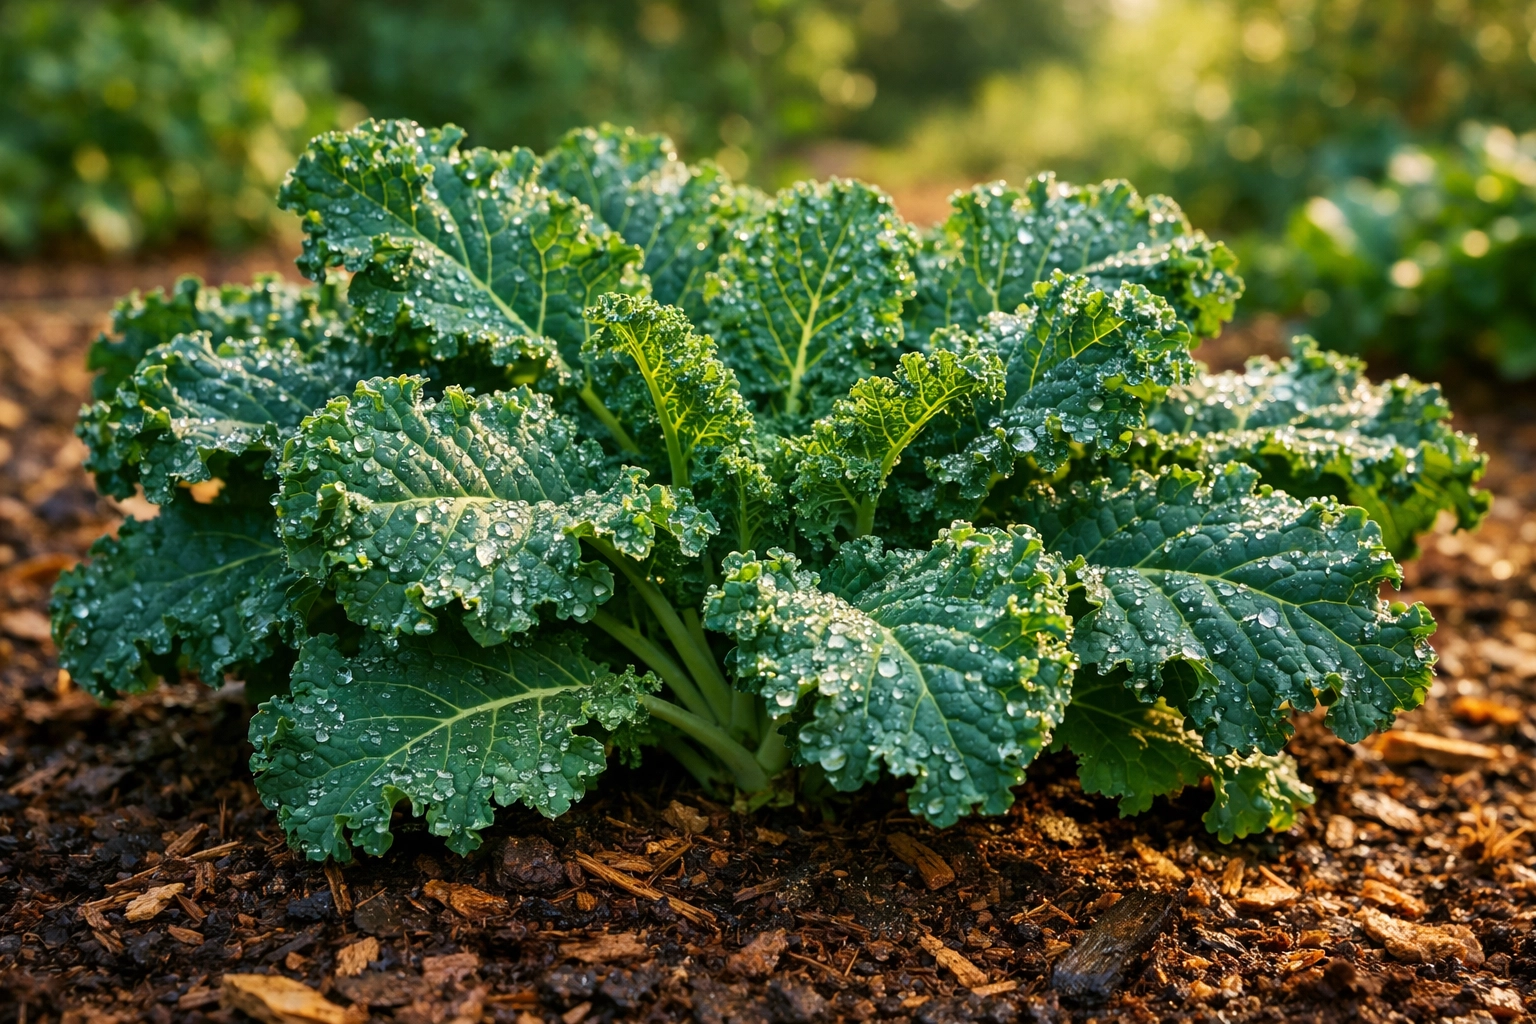
Harvesting: The Gift That Keeps Giving
Here's where kale truly shines: you can harvest leaves continuously for months rather than pulling entire plants. Start harvesting when leaves reach a usable size, typically when plants have at least 8-10 leaves.
For the best flavor and texture, pick outer leaves first, leaving the central growing point intact. This "cut and come again" method allows plants to continue producing new leaves from the center. Take only a few leaves from each plant at a time to avoid stressing them.
Harvest in the morning after dew dries but before afternoon heat. Leaves stay crisper and store better when picked at optimal times. If plants start to bolt (send up flower stalks) in response to heat or stress, harvest becomes urgent: leaves turn bitter once flowering begins.
Growing Wisdom: Final Thoughts
Growing kale from heirloom seeds connects you to a tradition of sustainable, resilient food production. It's a vegetable that rewards minimal effort with maximum nutrition, making it perfect for busy gardeners who want results without constant intervention.
Whether you're growing for fresh salads, sautés, or nutrient-packed smoothies, kale delivers. Its adaptability to various conditions, extended harvest window, and impressive nutritional profile make it a cornerstone crop for any home garden.
Start with quality seeds, provide decent soil and consistent moisture, and let kale do what it does best: grow. Your future self will thank you when you're harvesting fresh greens while neighbors' gardens have long since shut down for the season. That's the kale advantage: and once you experience it, you'll wonder why you didn't plant it sooner.