


There's something deeply satisfying about growing tomatoes from seeds you saved yourself. In my years working with gardeners, I've watched countless people discover the magic of seed saving: that moment when they realize they can close the loop and become truly self-sufficient in their gardens.
Saving tomato seeds isn't just practical. It's a connection to generations of gardeners before us who carefully selected and preserved the best traits in their favorite varieties. And when you're working with quality heirloom tomatoes, you're preserving genetics that have been passed down for decades, sometimes even centuries.
Let me walk you through everything you need to know to save tomato seeds like a pro.
Why Save Your Own Tomato Seeds?
Before we dive into the how, let's talk about the why. When you save seeds from heirloom varieties, you're maintaining genetic diversity in your garden. Unlike hybrid tomatoes, heirlooms breed true: meaning the seeds you save will produce plants with the same characteristics as the parent.
You're also adapting your tomato plants to your specific growing conditions. Over time, seeds saved from your garden become acclimated to your local climate, soil, and growing season. It's like creating your own locally-adapted strain.
Plus, there's the financial aspect. Quality heirloom seeds can cost a few dollars per packet. When you save your own, you're looking at essentially free seeds for years to come.
Selecting the Perfect Tomatoes for Seed Saving
This step sets the foundation for next year's harvest. You want to choose tomatoes from your absolute best-producing plants: the ones that showed disease resistance, produced abundantly, and gave you tomatoes with the flavor and texture you love.
Let the tomato ripen fully on the vine. I mean really ripe: even slightly overripe. This gives the seeds inside more time to mature, which translates to better germination rates next season. If you pick a tomato that's perfect for slicing onto your sandwich, leave it on the plant another week for seed saving.
Look for tomatoes that are uniform in color and free from disease spots or damage. Remember, you're selecting for the traits you want to see multiplied in your garden.
A word of caution: only save seeds from open-pollinated or heirloom varieties. Hybrid tomatoes won't produce seeds that grow true to type, and you'll end up with unpredictable results.
The Simple Extraction Method
If you're new to seed saving or just want a no-fuss approach, this method is your friend. It requires minimal equipment and still gives you viable seeds.
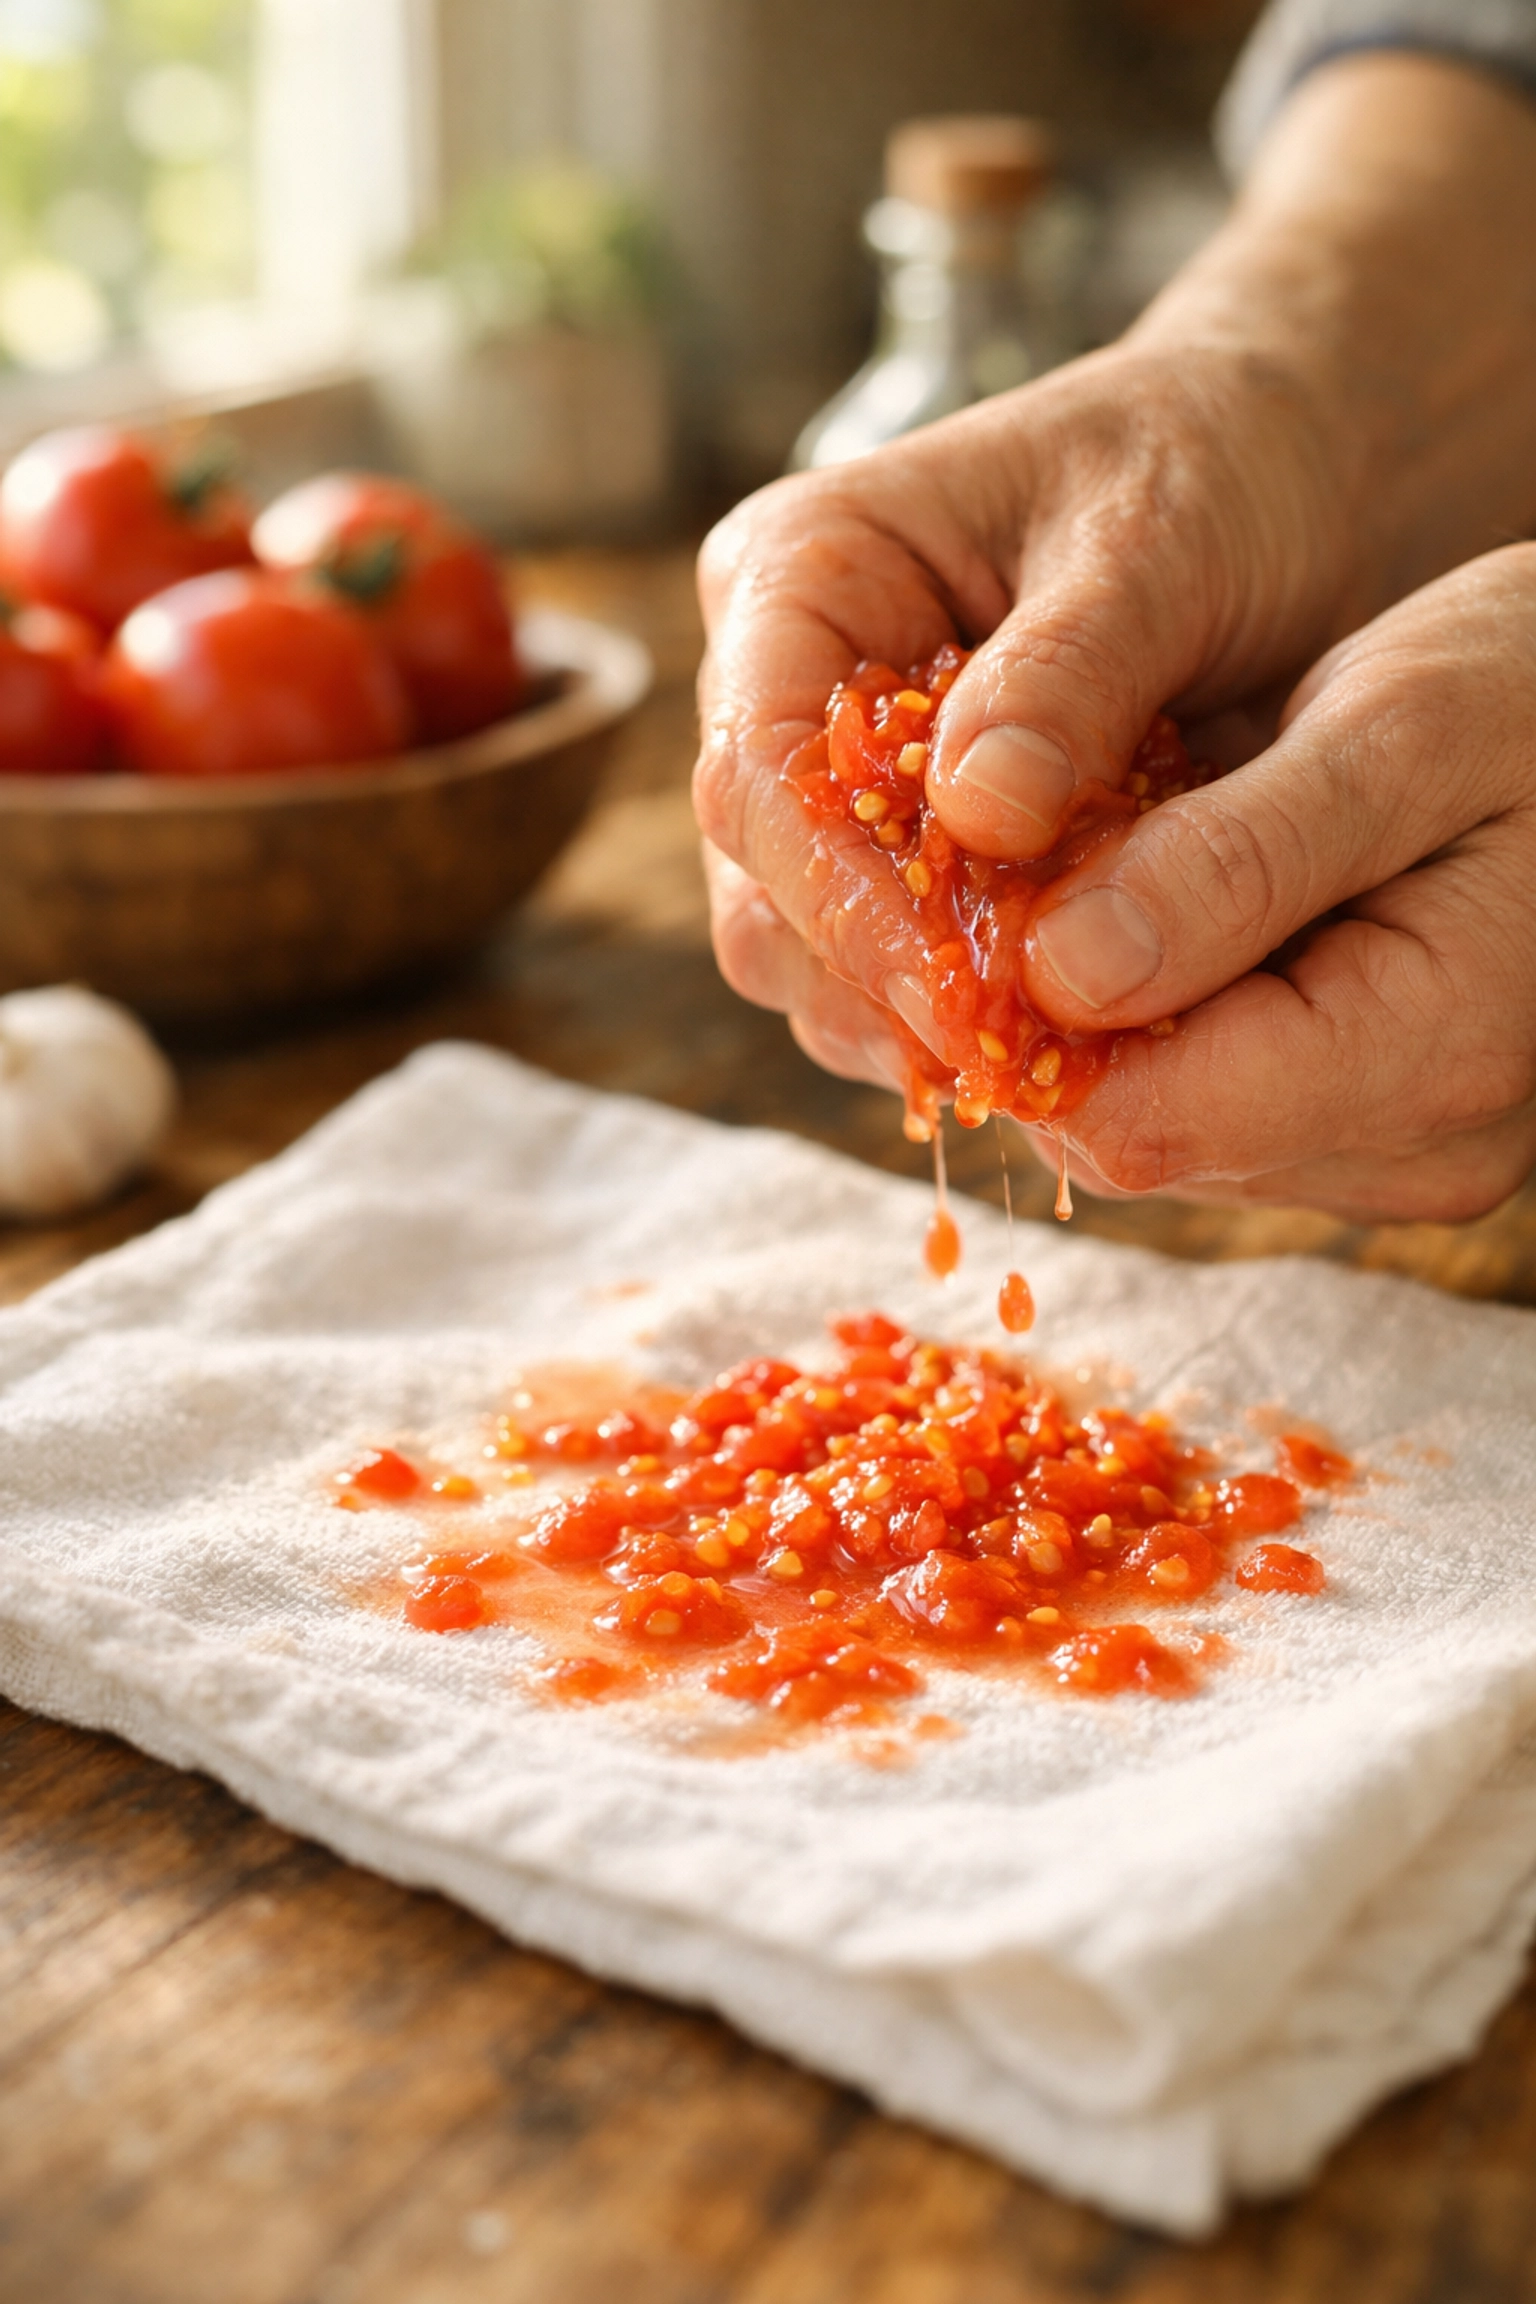
Slice your chosen tomato in half horizontally. Squeeze the seeds and gel-like pulp onto a clean kitchen towel or paper towel. Spread them out so they're not clumping together too much.
Place the towel on a flat surface like a plate or baking sheet, then set it on a sunny windowsill. The key here is good air circulation and warmth. Over the next two weeks, the seeds will dry right onto the towel.
Once completely dry, you can either peel the seeds off the towel or simply fold up the towel and store the whole thing in a labeled paper envelope. When planting time comes around next spring, just tear off a piece of towel with a few seeds attached and plant it directly.
The Fermentation Method: A Deeper Clean
This traditional method mimics what happens in nature when a tomato falls to the ground and decomposes. The fermentation process breaks down the gelatinous coating around each seed, which naturally inhibits germination. It also helps eliminate seed-borne diseases.
Start by squeezing your tomato seeds and pulp into a clean mason jar. Add a small splash of water: just enough to keep things liquid. Cover the jar loosely with a coffee filter, cheesecloth, or paper towel secured with a rubber band. You want air to get in, but you don't want fruit flies making a home in there.
Place the jar in a warm spot, ideally somewhere around 70°F or warmer. A kitchen counter works perfectly. Now comes the waiting game. Over the next 24 to 48 hours, you'll notice the mixture starting to bubble and develop a film on top. This is the fermentation at work.
The mixture might develop a bit of a funky smell: that's normal and actually a good sign. Just don't let it go too long. If you see mold developing, you've fermented too long.
After fermentation, it's time to rinse. Fill the jar with water and give it a good stir. The viable seeds will sink to the bottom, while the pulp, empty seeds, and debris will float. Pour off the floating material. Repeat this rinsing process several times until the water runs relatively clear and you're left with just clean seeds at the bottom.
Pour the seeds into a fine-mesh strainer and give them one final rinse under running water.
Drying Your Seeds Properly
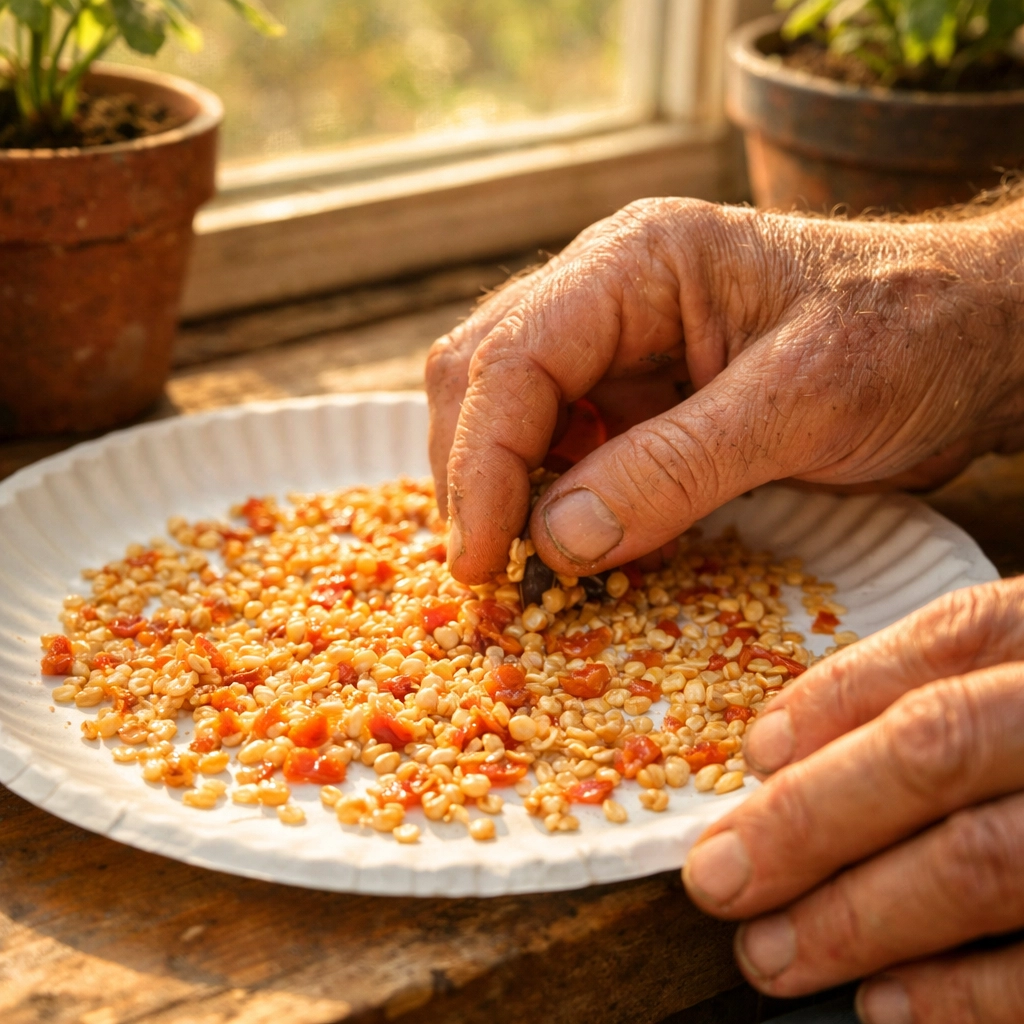
This step is crucial. Seeds that aren't completely dry before storage will mold or rot, and all your careful work goes down the drain.
Spread your rinsed seeds on a non-stick surface. Paper plates work beautifully, as do wax paper or parchment paper on a flat surface. Glass plates can work too, though seeds sometimes stick more. Avoid using paper towels for this final drying: seeds can stick stubbornly to the fibers.
Spread the seeds out so they're not touching each other. Place them in a warm, dry location with good air circulation. A sunny windowsill is ideal. Give them a gentle stir or shake once a day to prevent clumping and ensure even drying.
How do you know when they're ready? The seeds should be completely hard and brittle. Try pressing one with your fingernail. If it shatters or snaps cleanly, it's dry. If it bends or feels at all soft, give it more time. This process typically takes one to two weeks, depending on humidity levels in your home.
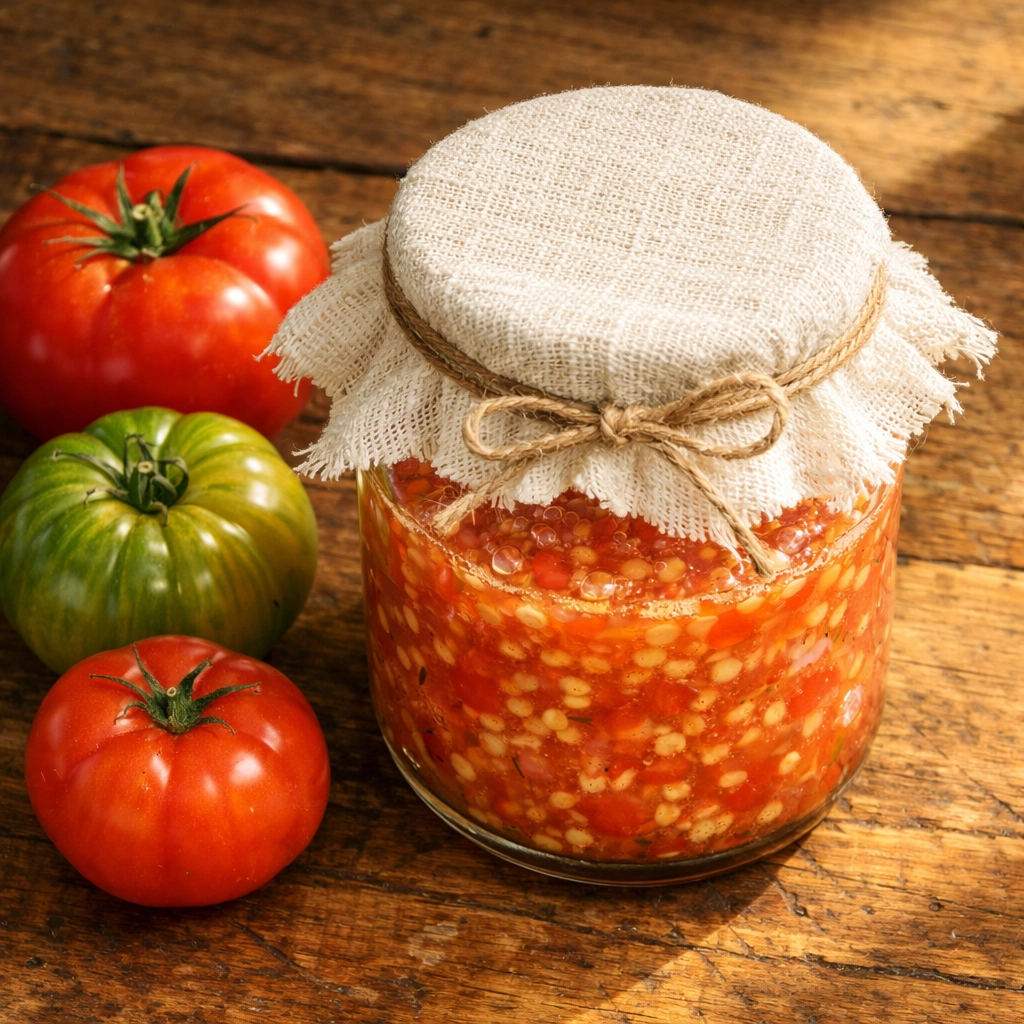
Storing Your Seeds for Long-Term Success
Once your seeds pass the snap test, it's time to store them properly. Label everything: and I mean everything. Include the variety name, the date you saved them, and any notes about the plant's characteristics. Trust me, you think you'll remember which variety is which, but six months from now, those mystery seeds will haunt you.
Paper envelopes work wonderfully for seed storage. They allow just enough air circulation while keeping seeds contained. Small glass jars or plastic containers work too, especially if you're storing seeds in the refrigerator.
Store your seeds in a cool, dry, dark place. A drawer, closet shelf, or pantry works well for room temperature storage. When stored properly in a cool, dry location, tomato seeds can remain viable for 4 to 10 years, though germination rates may slowly decline over time.
For even longer storage, consider keeping your seeds in an airtight container in the refrigerator. Some gardeners even use the freezer. Just make sure the seeds are completely dry first: any moisture will expand when frozen and damage the seeds.
Testing Germination Rates
Before you commit your entire garden bed to seeds from last year, it's smart to do a quick germination test. About a month before your planting date, place ten seeds on a damp paper towel, fold it over, and seal it in a plastic bag. Keep it warm and check after a week.
If seven or more seeds sprout, you're looking at a 70% germination rate, which is perfectly acceptable. If fewer germinate, you'll just need to plant more seeds to compensate.
Your Seed Saving Journey Starts Now
Saving tomato seeds connects you to an ancient tradition of gardeners who understood that the best seeds come from plants that thrive in your specific garden. Each season, you're not just growing tomatoes: you're actively participating in preserving heirloom varieties and adapting them to your unique growing conditions.
Start with just one or two of your favorite varieties this season. As you gain confidence, you can expand your seed saving to include more varieties. Before long, you'll have a collection of locally-adapted, tried-and-true seeds that produce exactly the tomatoes you want to grow.
The seeds you save this year could be producing harvests in your garden a decade from now. That's the kind of sustainable, forward-thinking gardening that creates abundance season after season.